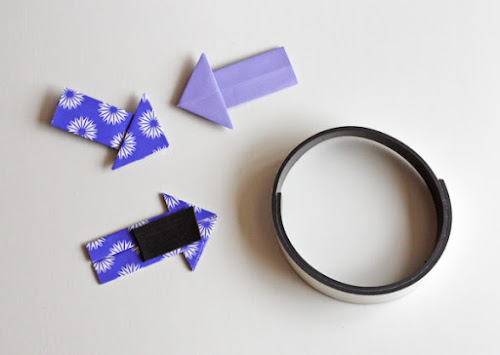
Origami arrow magnets and tacks

It only takes a minute to make simple origami arrows. They can be used as magnets to hold up your stuff.

I added self-adhesive magnet tape to these, available from craft stores. You could also chop up some of those free magnets that come in the mail with advertisements on them and glue those on.

The arrows can also be turned into thumbtacks for your pin board.

Lift up the arrow head flap, poke a tack through the paper, and stick the head back down on top of the tack using glue or double stick tape.
I learned how to make the arrows from Joost Langeveld's site. Refer to the instructions there, or read on to see my steps.
How to fold a paper arrow:
Start with a square piece of paper. Origami paper is easiest to fold because it's thin. If you don't mind a bit of wrestling, you can also use regular printer paper like I did for the red and orange arrows. Those were made from 3" squares. The patterned purple arrows were made from 2.5" squares.
I'll add captions below each photo.

With the pretty side down, fold a square paper in half and open it again. (Or as Maria suggested in the comments, just press a little pinch to mark the center. Then your finished arrow won't have a crease running through the center.)

Fold the top and bottom edges inward to meet the center crease.

Fold the two left corners inward at a 45 degree angle. Edges should align with the center crease.

Fold the pointed end over.

Turn the paper over so the point is hidden, then align it so that the point is positioned like the pink line in the diagram (though the point is on the underside and not visible.) Grab the top edge of the rectangle and fold it down, making a valley fold along the dotted line.

The result should look like this. Half of the pointed triangle is exposed.

Rotate the paper 90 degrees counterclockwise. (Well, you don't have to, but I found it easier and that's what the photos show!) Press down with your fingernail at the point where the top layer of paper meets the triangle. Poke your other finger in between the two layers of the flap to open up a little pocket, at the same time folding the long top edge of the flap down to meet the center crease.

Squash the resulting triangle flat.

It should look like this.

Repeat on the bottom side, folding the bottom edge upward to meet the center crease.

It should look like this.

Flip the arrow over and you're done.
If the arrow wants to pop apart a bit (especially if you use thicker paper), add some glue or double stick tape under any flaps to hold them down.

17 comments:
HI Jessica!, love this idea and love origami :D! thanks for the sharing!
XOXO
Super cute! And you also have a deck of cards containing your "logo"?! Impressive! ;)
Mum
Just one card with the letter J on it. Megan gave it to me once. I think she found it in a thrift store or something. It must be the joker.
Heh heh.
That's a nice one!
BTW you can get rid of the crease running along the completed arrow if you just pinch the paper in the center instead of creasing it all the way from edge to edge on the first step.
Excellent tip, Maria!
I used a Post-it note and it worked really well! Great tutorial, thanks!
Neat tutorial! Also, I love your typing diagram. Where did you get it?/Who designed it?
I remember folding notes in class like this before passing them to friends. I love the way you use them though. Thanks for reminding me how to make arrows like this.
Interesting! I am trying it soon :)
Wow, this is a really nice idea! I was just wondering what to do today but this solved the problem. Little arrows I'm gonna make! :)
Wow! I love it!
Thanks for the nice idea!
I love this DIY!! Thank you for the detailed instructions :D
Amber, the typewriter postcard came in the mail from Uppercase magazine. You can see it here.
What a fun, simple craft! Thanks for sharing!
Margeaux
margeauxknight.blogspot.com
I am definitely Pinning this one! LOVE it! Thanks.
Love this! Thanks for sharing all of your great finds with us all!
http://faerydustdesigns.com/origami-arrow-for-displays/
i like this, i will glue it a magnet and use it fridge
Post a Comment